THINGS TO DO AFTER ROOTING- PART 2
This is PART 2 of THINGS TO DO AFTER ROOTING. In the part 1, I covered How to remove system apps, freeze the apps from running in background, change DPI and bootanimation, Hide/change navigation bar.
There are still a lot more things you can do. I won't be able to cover all of them but I will try to list the important ones.
To put it simply, these are the safe limits for your device, but that doesn't mean that the device can not cross this. Of course you can increase the limit but this should be done very carefully as you are playing with the CPU now and one wrong move can damage your device.
So let's begin. First you need to download any kernel mod app. This is necessary because it includes many features at a single place. I prefer using Kernel Adiutor (ROOT). It's simple to use and support many kernels out there.

Click the menu and go to CPU. Increase the limit of CPU Maximum Frequency and CPU Minimum frequency. DO not increase to a very high value, try one step raise at a time and check if the device is responding properly.
You can also change CPU Governor setting to performance.
Underclocking the CPU will save some battery for your device. SO to underclock, just decrease the frequencies below the default values.
You can do a lot more things with kernel mod apps, for eg- low memory killer, modify build.prop, modify/create init.d, virtual memory setting, I/O scheduler, Srgb mode etc. I will discuss these in some other article.


Flashing a ROM is same as flashing a Mod, download the zip file and flash it via the recovery. Go through the instructions on the ROM thread. The most general steps involved in flashing a ROM are
There are still a lot more things you can do. I won't be able to cover all of them but I will try to list the important ones.
5.) Overclock/underclock your device
I am sure you must have heard about overclocking the CPU in a computer. You can do the same in your phone too. Overclock means increasing the operating frequency limit of the device. Whenever you decide to buy a new device and you start doing research about features, you must have come across CPU frequencies i.e 2.2 GHz or 1.8 GHz etc. These are the MAX frequencies, respective devices can reach.To put it simply, these are the safe limits for your device, but that doesn't mean that the device can not cross this. Of course you can increase the limit but this should be done very carefully as you are playing with the CPU now and one wrong move can damage your device.
So let's begin. First you need to download any kernel mod app. This is necessary because it includes many features at a single place. I prefer using Kernel Adiutor (ROOT). It's simple to use and support many kernels out there.

Open the app, Give root permission and on the home page it shows you different temperatures and frequencies your device is operating at.

You can also change CPU Governor setting to performance.
Underclocking the CPU will save some battery for your device. SO to underclock, just decrease the frequencies below the default values.
You can do a lot more things with kernel mod apps, for eg- low memory killer, modify build.prop, modify/create init.d, virtual memory setting, I/O scheduler, Srgb mode etc. I will discuss these in some other article.
6.) Install Busybox
Busybox is a set of library files, which installs in the system directory. This is important as some apps require busybox to run, eg- Titanium Backup.

Just install the app, Give root permission and select install.
7.) Install Greenify
Greenify is one of the best options available if you want to save battery or data consumed by apps running in the background. Greenify hibernates the apps after the screen goes off or you can manually hibernate them even if the screen is on.
Greenify works for the non rooted devices too, but after rooting, you can get access to a lot more features than non-rooted devices.
Install the greenify from play store and follow along
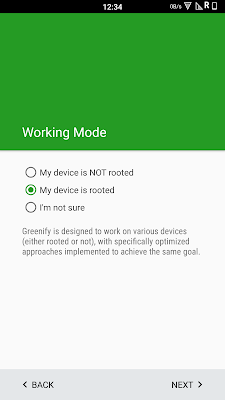
Open the app and select my device is rooted and give the root permission.

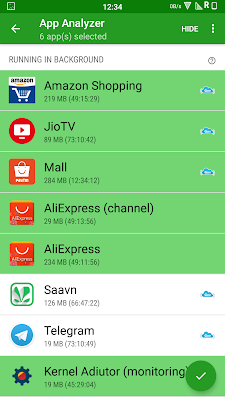
Press the 'PLUS' button and add the apps you want to prevent from running in the background.


You can press the 'sleep' button to hibernate them now or they will automatically hibernate after the screen goes off.

You can explore more settings in the setting tab. Some of the features requires the donation version and some requires the Xposed Framework. I will discuss Xposed Framework in upcoming posts.

8.) Flash(Install) Mods
Mods (modifications) are the zip files, which contain some binary files for your device. Flashing is necessary in some conditions as apps can't have access to certain parts of your device. You can find many Mods for your device on XDA. But before flashing mods, you must flash a custom recovery.
Custom recovery is very important if you want to flash the mods in your device as stock recovery does not allow flashing any custom files. There are many custom recoveries available for eg- TWRP, Philz, CWM etc. I will cover the TWRP as this is most widely used and support most of the devices. The process is same for all other recoveries also.
First you need to download recovery for your device from https://twrp.me/Devices/. Also, you need to have ADB and FASTBOOT installed in your computer. Go here if you have problem installing fastboot and adb.
Now go to bootloader of your device (you can google the key combination to boot into bootloader for your device).
Open the adb folder and press SHIFT and right click and select 'open command window here'.
Move your downloaded recovery file to this folder and rename it to something simple, let's name it twrp.
You can check if the fastboot is connected by writing the command
fastboot devices

Now flash recovery by writing the following command
fastboot flash recovery twrp.img
You should see a success message. Now unplug your device and boot into recovery by pressing some combination of keys (you must google for this combination for your device).
Now it's time to flash the mod you downloaded. Make sure to make backup of your ROM before flashing any mod as mods are very likely to softbrick your device.
To make backup, go to Backup and select all and swipe.
TO install the zip file Select install > install from sdcard/internal > filename.zip and then swipe and you are done.
There are many mods available on XDA, which works generally for every device. Some of them are listed below
- AKT profiles (battery saving and performance)
- Viper for Android (Sound mod)
- Pixel Mod (pixel icons and colors)
- Camera mods (device specific)
- Magisk (undetectable root)
- Emoji mods
- animations mods etc..
This list is very long. You can google about mods for your device.
9.) Flash Custom ROM
Ability to use custom ROMs is best part of having an android device. Custom ROMs are rich in features, battery backup and have better performance too. It also helps you use the latest version of android in your subsequently older devices, which are not getting updates from the OEMs. For eg- Nexus 4 ( device from 2012 ) recently got Android 8 (Oreo) custom ROM.Flashing a ROM is same as flashing a Mod, download the zip file and flash it via the recovery. Go through the instructions on the ROM thread. The most general steps involved in flashing a ROM are
- backup your current ROM
- wipe system and cache
- flash rom
- flash gapps, root and any other mod
- reboot
Custom ROMs is a huge topic and I will cover it in future articles. For now here is the list of some very popular custom ROMs:
Lineage OS ( earlier known as Cyanogen Mod)
Lineage OS is very popular as it supports even the low end devices. You can configure the working of the navigation bar, status bar, notification drawer and hardware buttons. Moreover, the ROM is regularly updated and available on the market.
Paranoid Android
I am a very big fan of PA. They have some really cool features like hover, immersion mode, PIE, halo, color engine. Like Lineage OS, they also support a wide range of devices. Most of their features are unique. The ROM has a beautiful interface and you can customize everything the way you want.
Resurrection remix
Resurrection Remix is one of the widely used custom Rom. It is based on Lineage OS and contains tons of features from all other ROMs and this is what makes it favourite. You don't need to use different ROMs for their unique features, You will find all those in this one.
The updates are also very frequent and it have a good community support.
There are more ROMs like
- Dirty Unicorn
- Xenon HD
- Cataclysm
- Carbon ROM
- Blisspop
- Omni ROM
- Euphoria etc..
They all are great and developers put a lot of efforts to make them so. Each ROM have some unique qualities, which makes it special. So if you are looking for a good ROM, well you have to try them out and find the one which suits your preferences.
This is it for today. I will talk about features of these ROMs in the upcoming articles and also about how to get some unique features without changing the whole ROM.
Leave comments if you have any doubts. Subscribe to this blog for more android related stuff.
THINGS TO DO AFTER ROOTING- PART 2
 Reviewed by Controllerstech
on
September 22, 2017
Rating:
Reviewed by Controllerstech
on
September 22, 2017
Rating:
Reviewed by Controllerstech
on
September 22, 2017
Rating:


No comments: